标准化实施指南 | 白皮书 | Citrix
PoC标准化实施指南3.0
Citrix Cloud – CVAD Service Setup
版本:Draft
www.citrix.com.cn
目 录
修正历史 2
第1章 Citrix Cloud Basic Setup 3
1.1 Citrix Cloud Login 3
1.2 Citrix Cloud initial setup for CVAD service 5
第2章 CVAD Resource Integration 11
2.1 Configure Citrix Cloud Connector 11
2.2 Integrate Resource Location – with On-Premise Site Aggregation 15
2.3 Integrate Resource Location – with VDA Workload only 20
Citrix Cloud Basic Setup
Citrix Cloud Login
| 步骤 |
操作 |
|
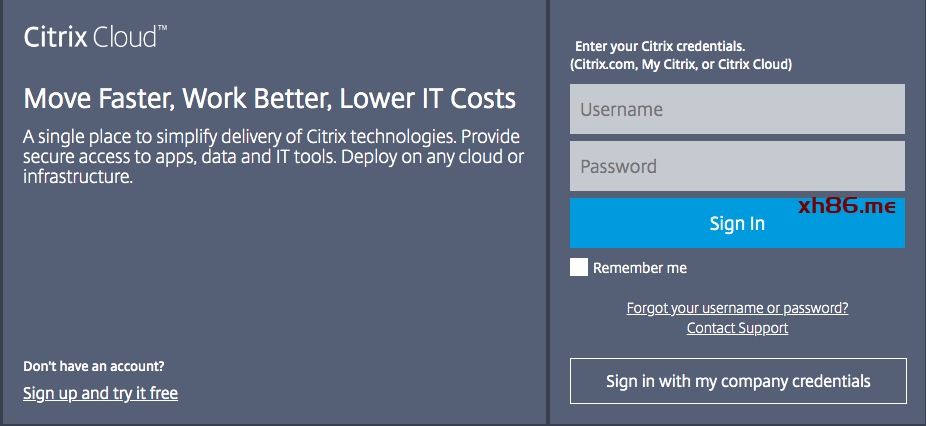
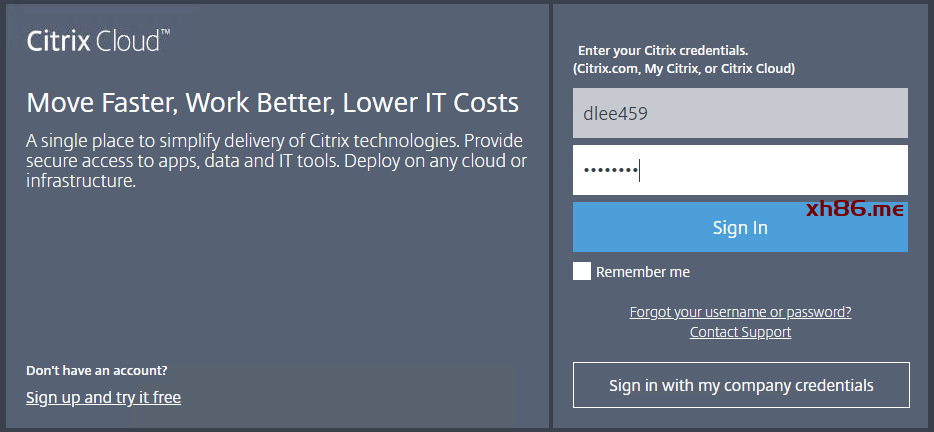
Open a web browser and launch to the website “https://citrix.cloud.com”.
Enter the administrator credential for the Citrix Cloud environment.
|
|
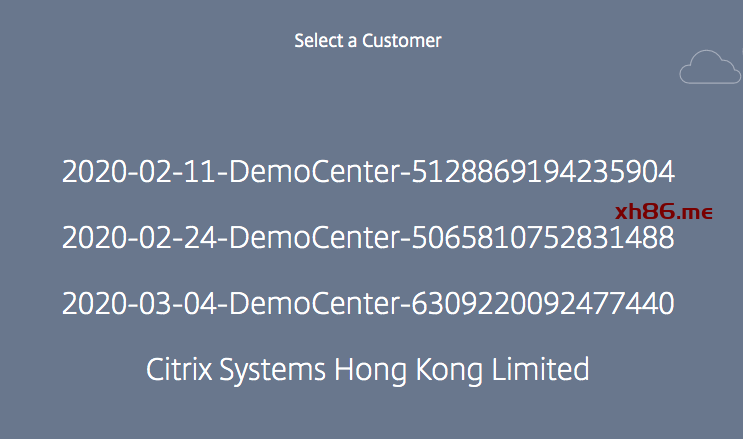
Select the specified tenant for the demo.
|
|
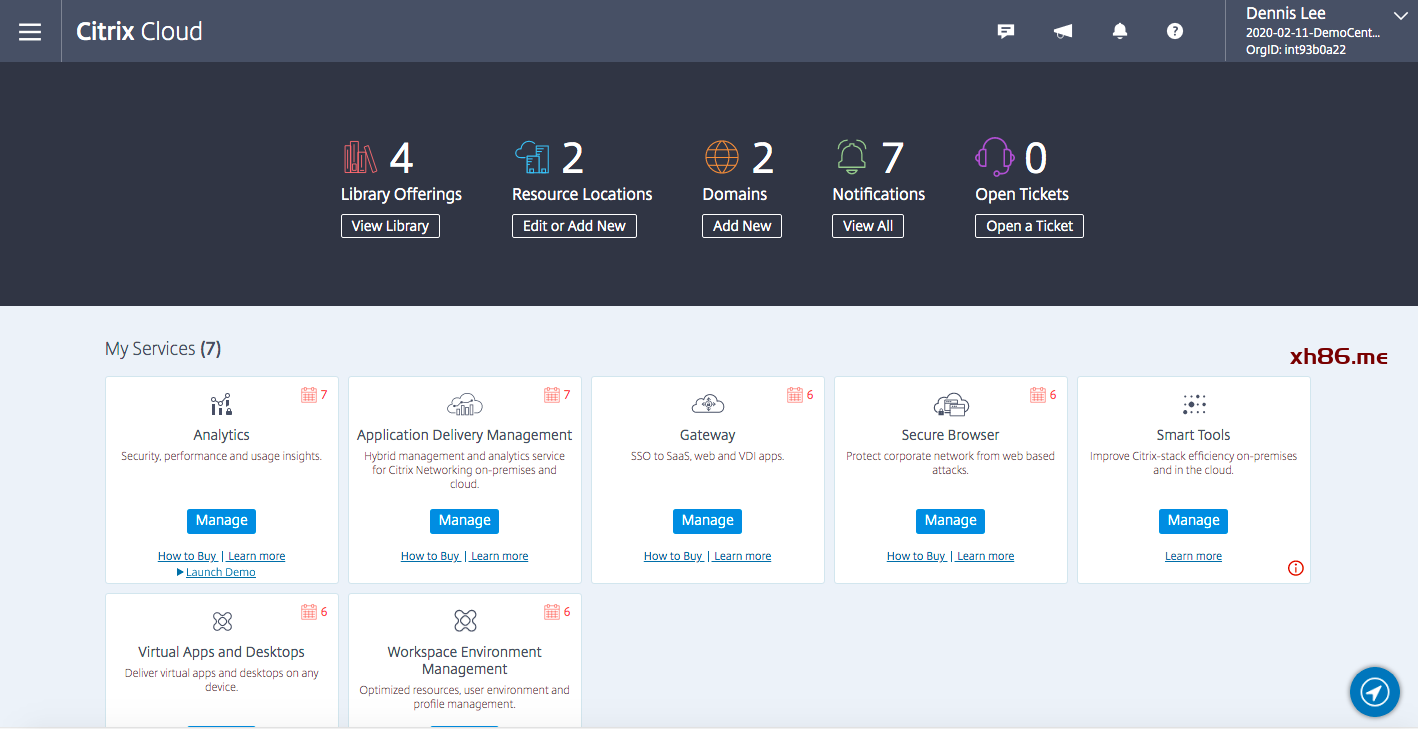
The administration console will be shown with all the applied Citrix Cloud service.
|
Citrix Cloud initial setup for CVAD service
| 步骤 |
操作 |
|
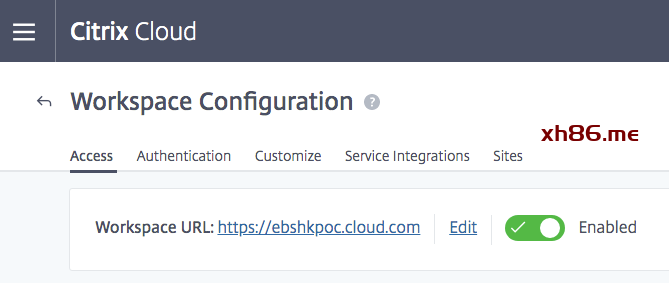
Change Workspace Login Address
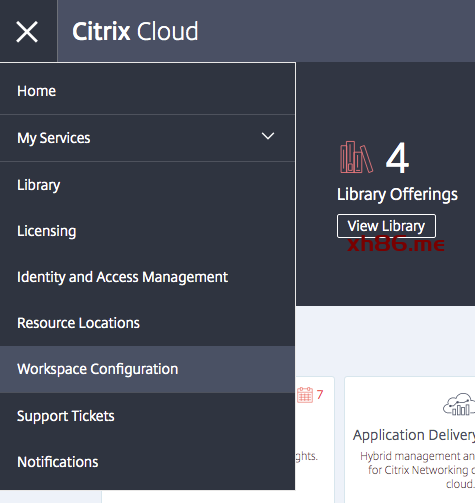
- Click “Home” > “Workspace Configuration”
- Click “Edit” for “Workspace URL”
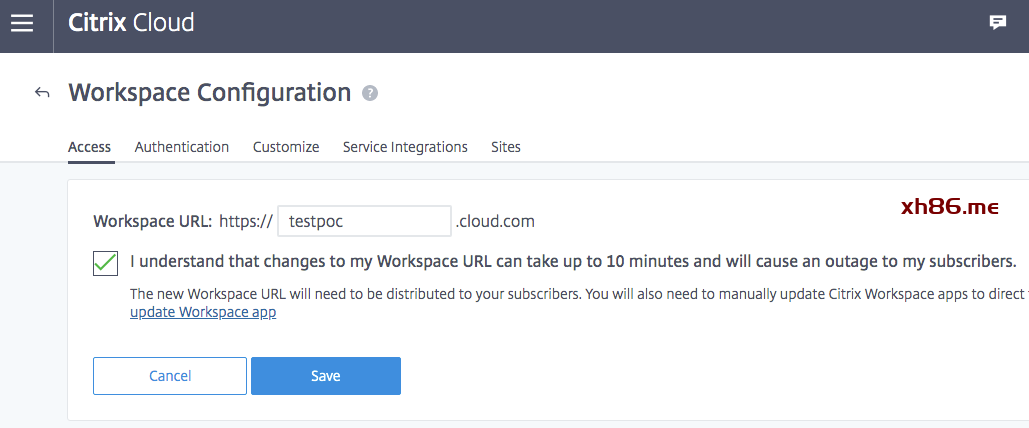
- Enter the prefix of Workspace URL
- Check the box to agree 10 minutes service outage
- Click “Save”
Notes:
- Auto detect if the prefix is available
- This configuration will cause up to 10 minutes service outage
|
|
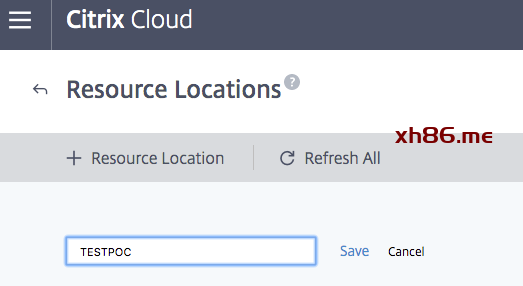
Create Resource Location
- Click “Home” > “Resource Locations”
- Click “+ Resource Location”
- Enter the Resource Location name
- Click “Save”
- The created Resource Location will be shown
Notes:
- You may have several demos and PoCs hosted in one Citrix Cloud environment
- Each demo / PoC should have it’s own Resource Location connected by separate Cloud Connector
|
|
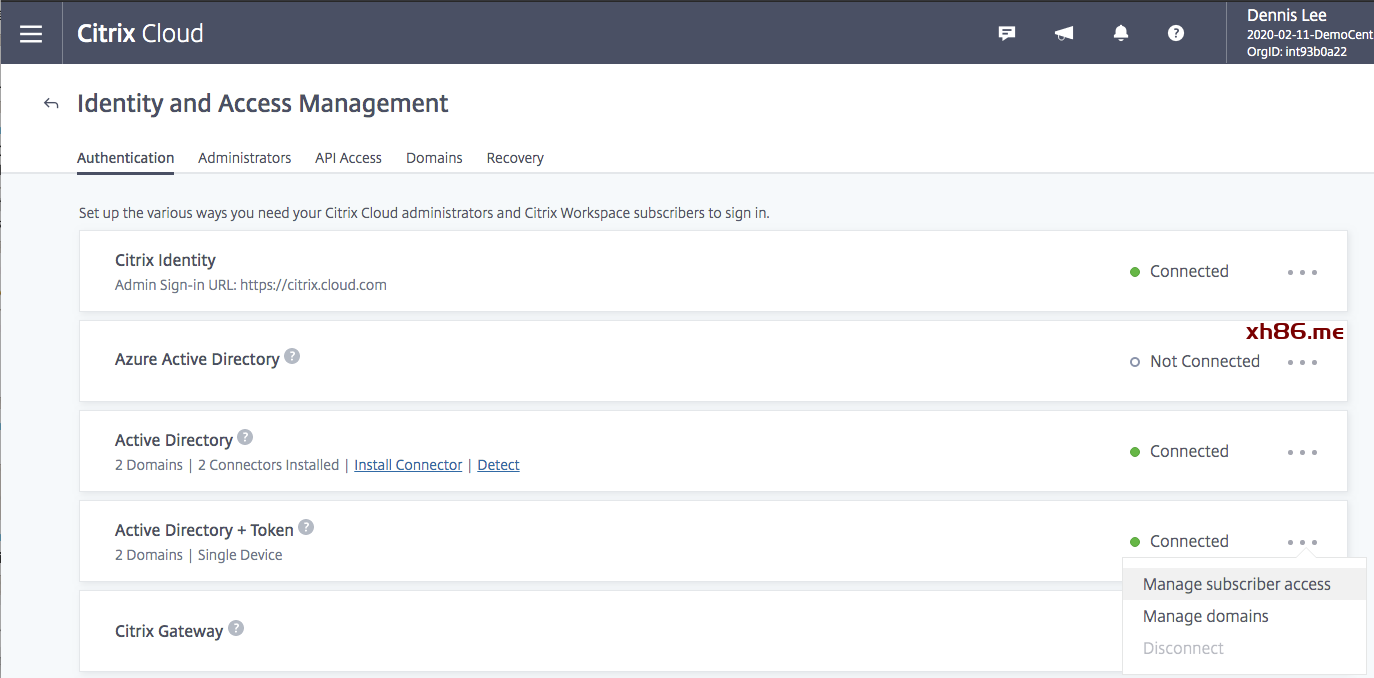
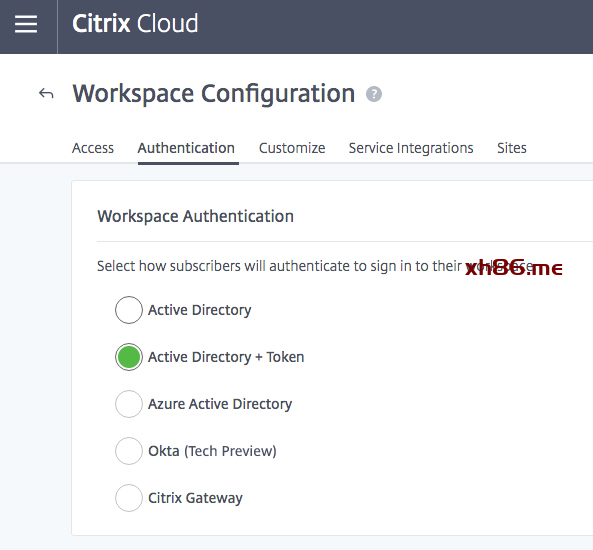
Enable One Time Password (OTP)
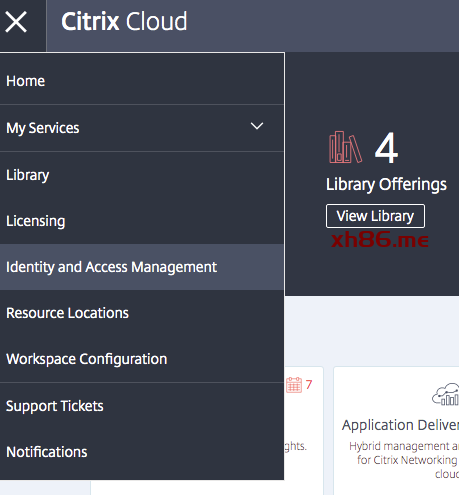
- After the Cloud Connector installation, click “Home” > “Identity and Access Management”
- Click “…” > “Manage subscriber access” of “Active Directory + Token”
- Choose “Active Directory + Token”
Notes:
- This configuration will cause around 1 day service shortage
- Recommended bundled feature to show with the demo
|
|
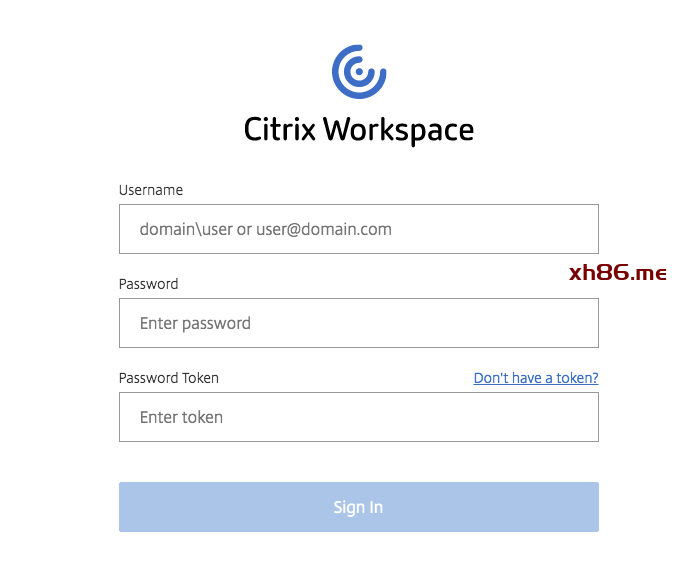
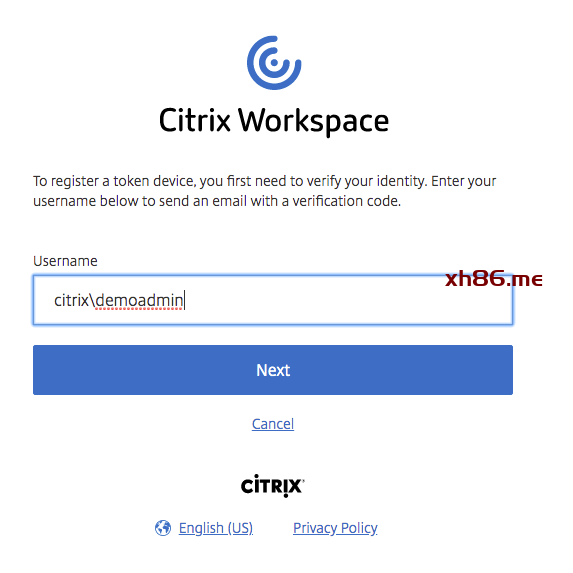
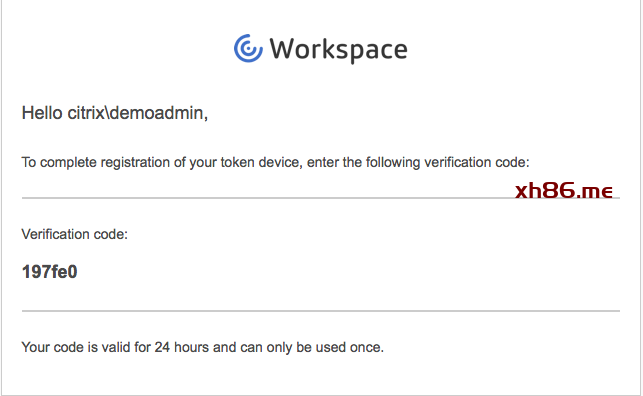
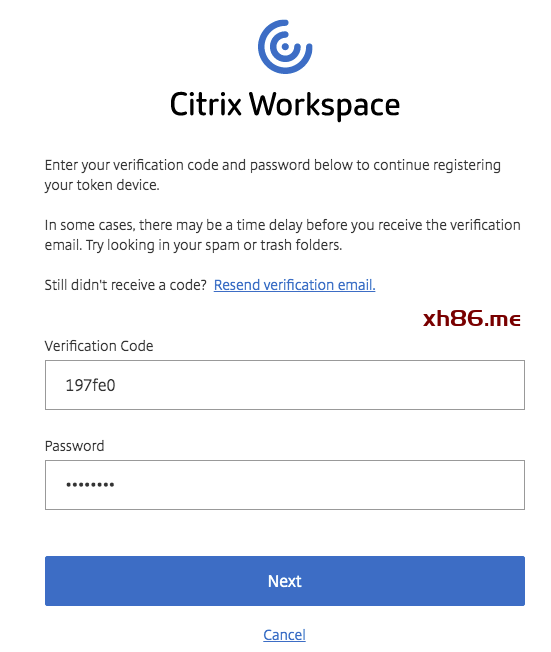
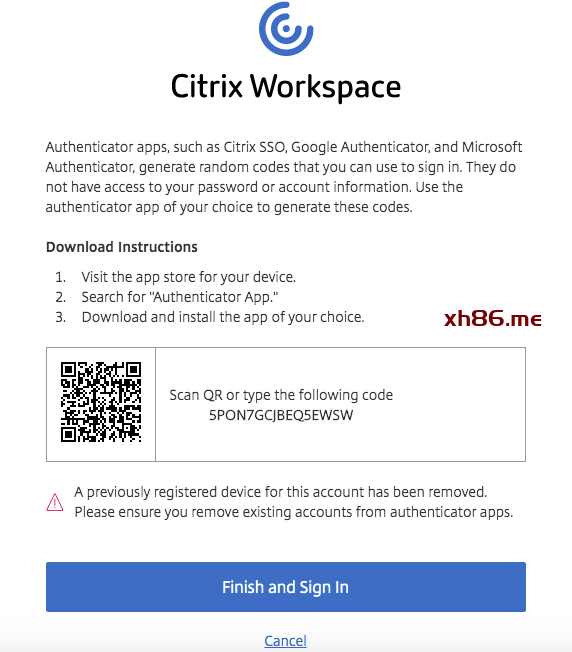
OTP Token Registration (Workspace Login)
- Browse to Workspace Login URL
- Click “Don’t have a token?”
- Enter the “Username” and click “Next”
- Click the account email and receive the “Verification Code”
- Enter the “Verification Code” and “Password” and click “Next”
- The token QR Code and token code is returned
|
|
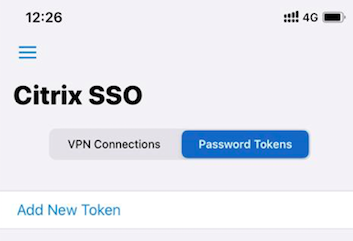
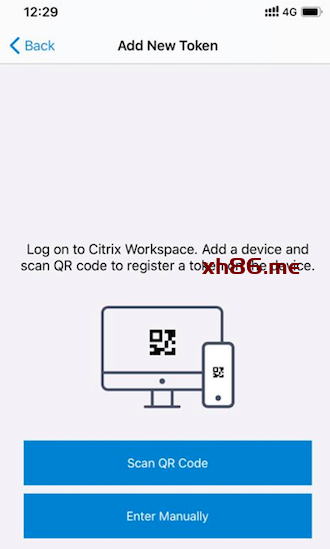
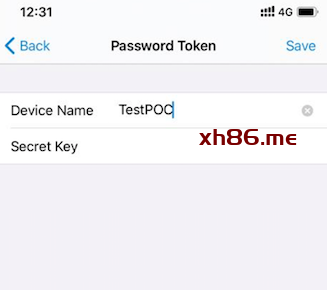
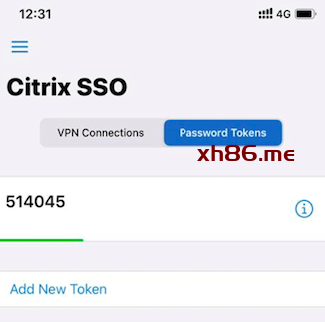
OTP Token Registration (Mobile Device)
- Launch “Citrix SSO” in your mobile phone
- Click “Password Token” > “Add New Token”
- Scan the QR Code or enter the token code manually
- Enter the token name and click ”Save” and the Token will be shown
Note:
- You may use “Google Authenticator” OR “Microsoft Authenticator” instead
|
CVAD Resource Integration
Configure Citrix Cloud Connector
| 步骤 |
操作 |
|
- Login to the Citrix Cloud Connector machine using Domain Administrator account
- Start a web browser, and navigate to https://citrix.cloud.com. Log into Citrix Cloud using your Citrix Cloud credentials.
|
|
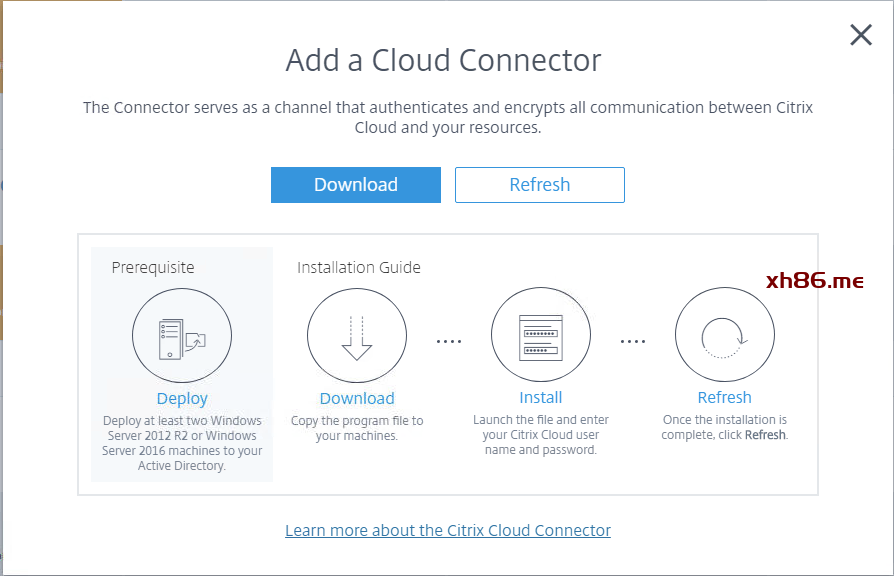
- Click the Hamburger Menu on the top left and select Resource Locations.
- Click “+ Cloud Connector” at your prepared Resource Location. Download and install (As Administrator) the Citrix Cloud Connector (cwcconnector.exe) software.
Notes:
|
|
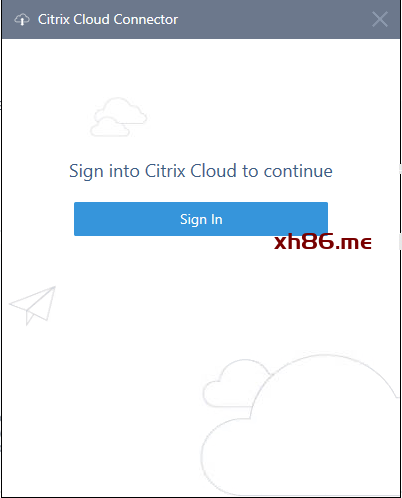
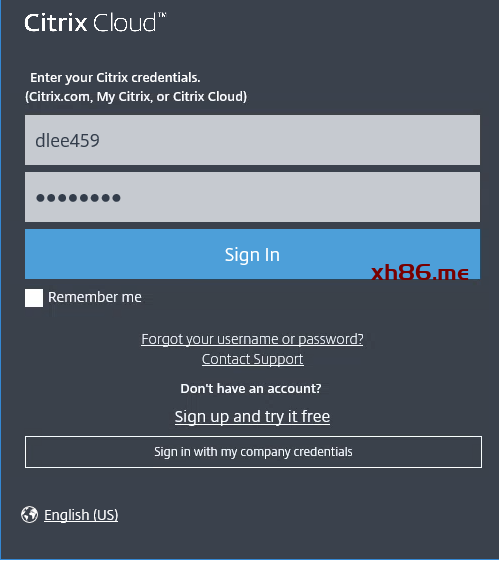
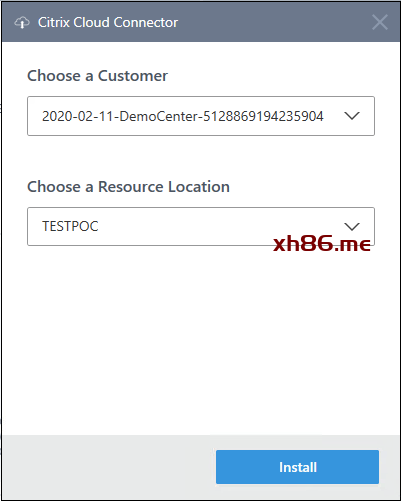
- In the Citrix Cloud Connector, Sign in with your Citrix Cloud credentials. Choose the specified Customer Zone (The provisioned Citrix Cloud) and Resource Location.
- Click “Install”
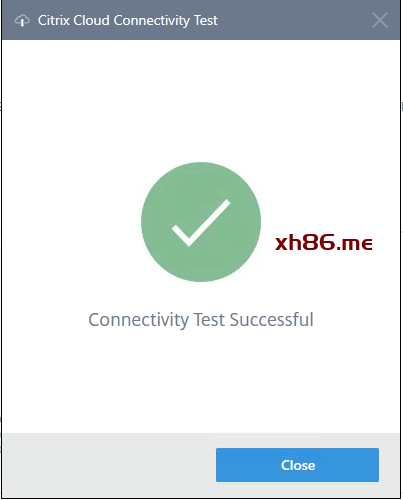
- Once the installation is complete, and the connectivity test is successful (connectivity test can take a few minutes), click Close to close the installation window.
|
|
- Back in the Citrix Cloud browser session, click Refresh in the ‘Add a Cloud Connector’ page. You should see the page showing 1 Cloud Connection in orange as it has only one Cloud Connector without HA.
|
|
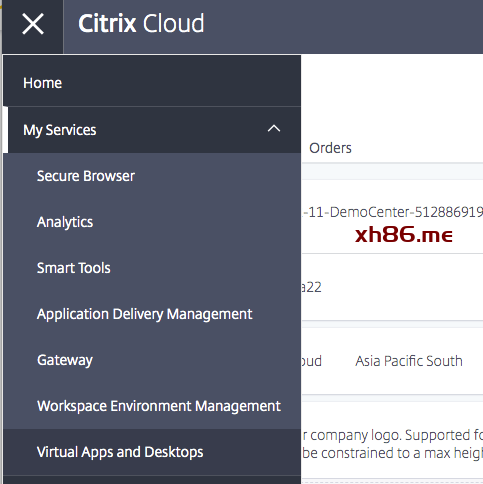
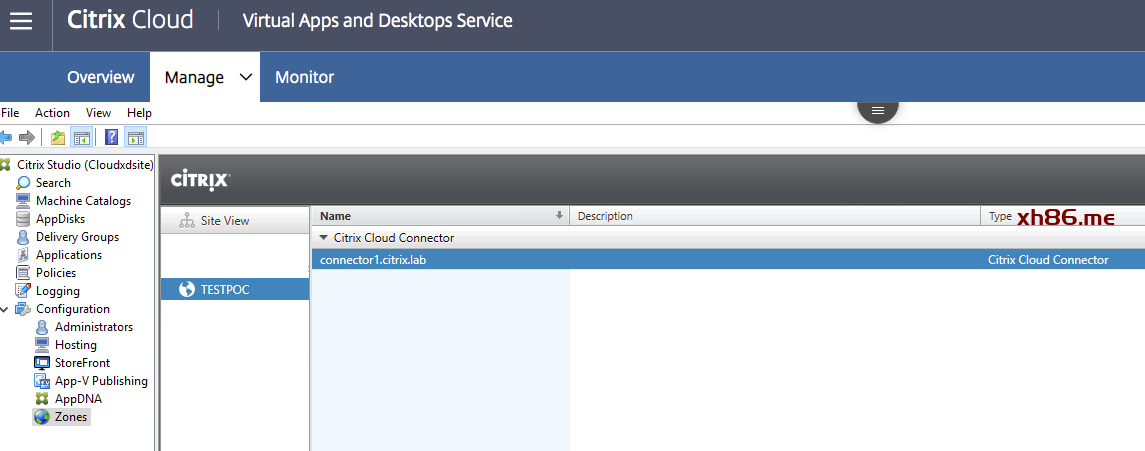
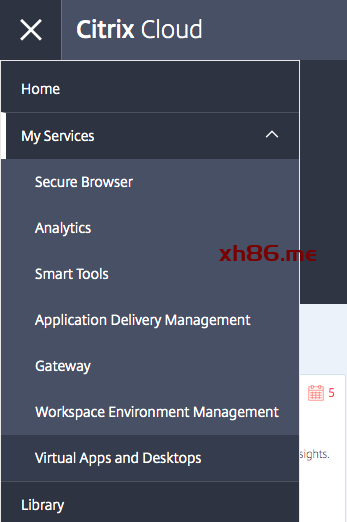
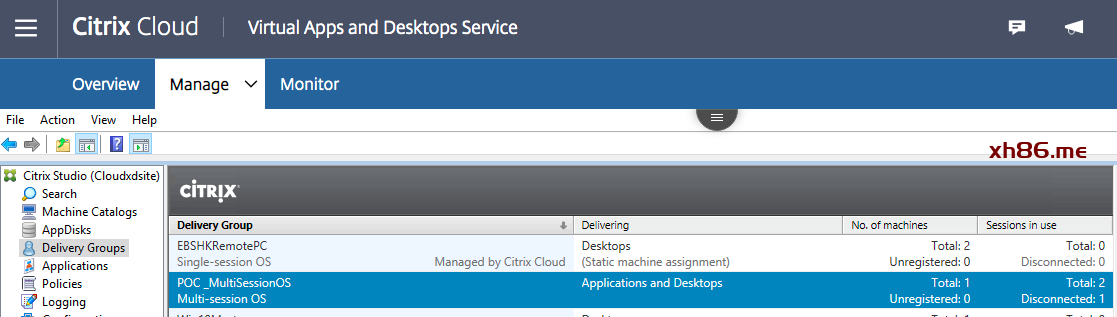
- Go back to Citrix Cloud portal. Click the Hamburger Menu, expand My Services and select Virtual Apps and Desktops
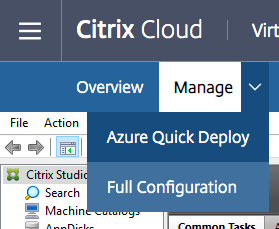
- Click the Manage tab.
- Verify that the Citrix Cloud Connectors (Connector1) have been added under the specified Site inside Zones node
|
Integrate Resource Location – with On-Premise Site Aggregation
| 步骤 |
操作 |
|
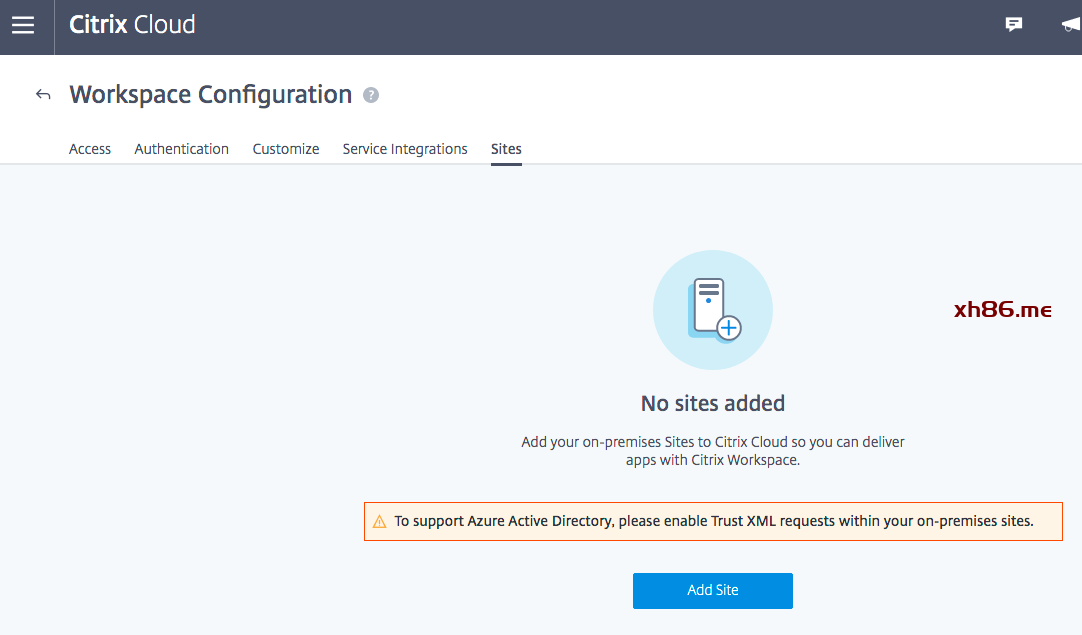
- Browse “https://citrix.cloud.com” and login to Citrix Cloud using the Citrix Cloud admin credential
- Click the Hamburger Menu and select Workspace Configuration
- Select “Sites” > “Add Sites”
|
| 步骤 |
操作 |
|
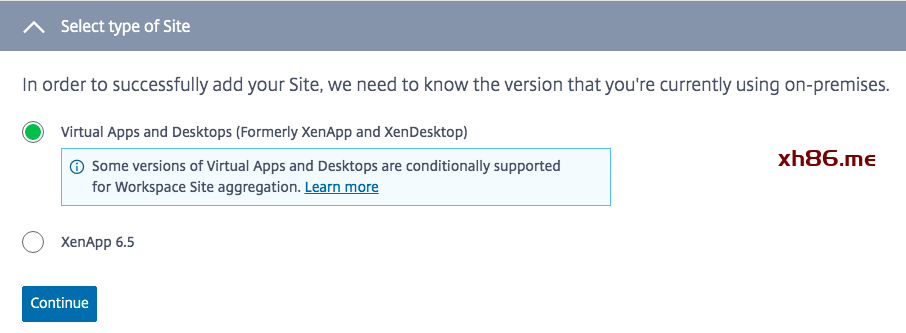
- Select Virtual Apps and Desktops (Formerly XenApp and XenDesktop), then click Continue
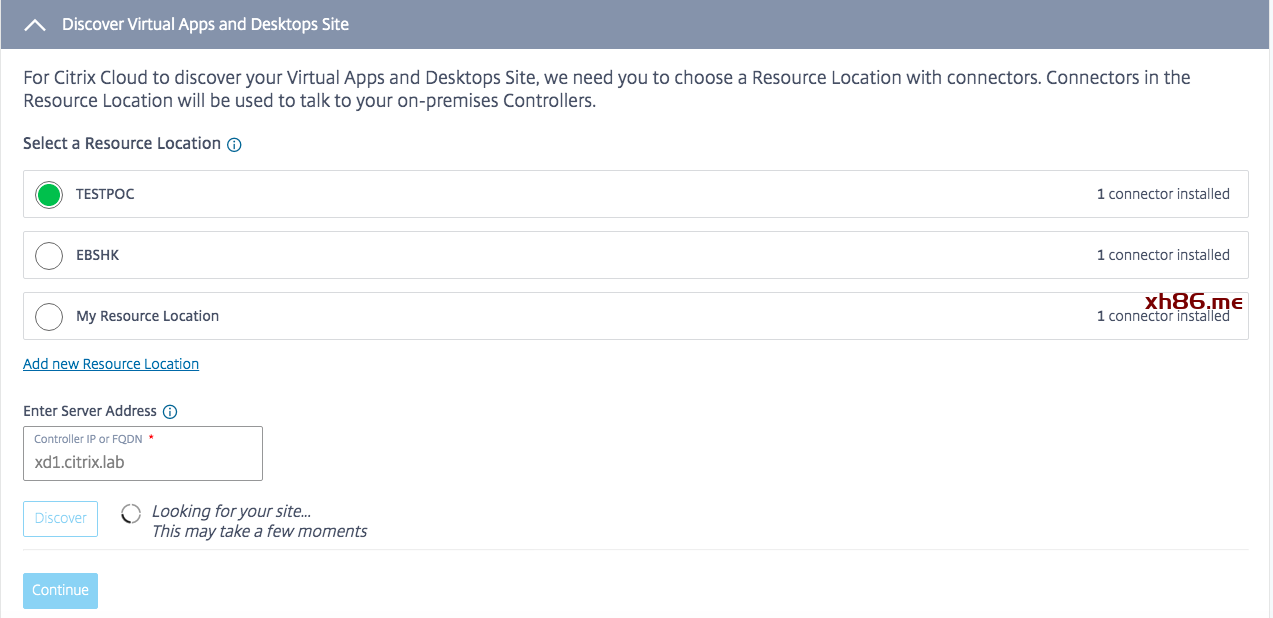
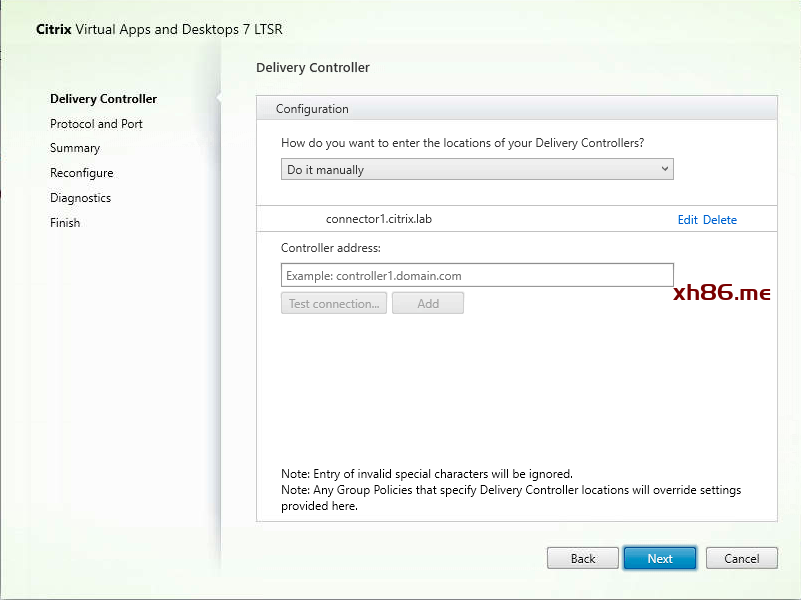
- Select My Resource Location, enter Delivery Controller Address as the Server Address, then click Discover
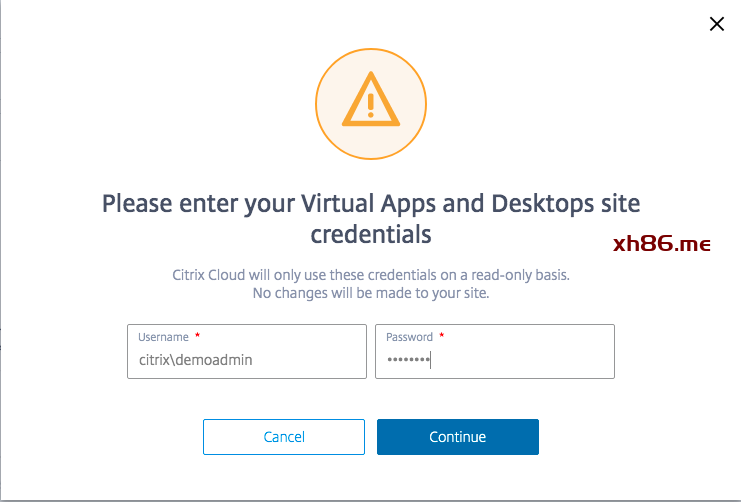
- When prompted with Please enter your Virtual Apps and Desktops site credentials, enter domain administrator credential as the username and the password you have, and click Continue
- When notified with Success! We found the site Local Farm, click Continue
Notes:
- Prepare the Domain Admin credential
|
|
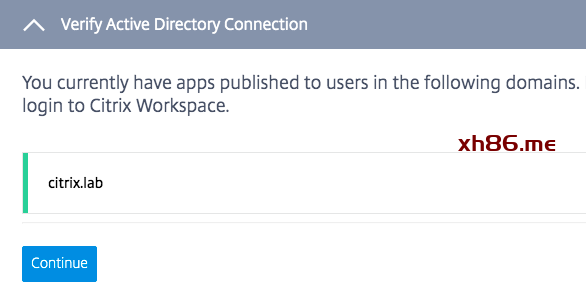
- On the Verify Active Directory Connection screen, click Continue
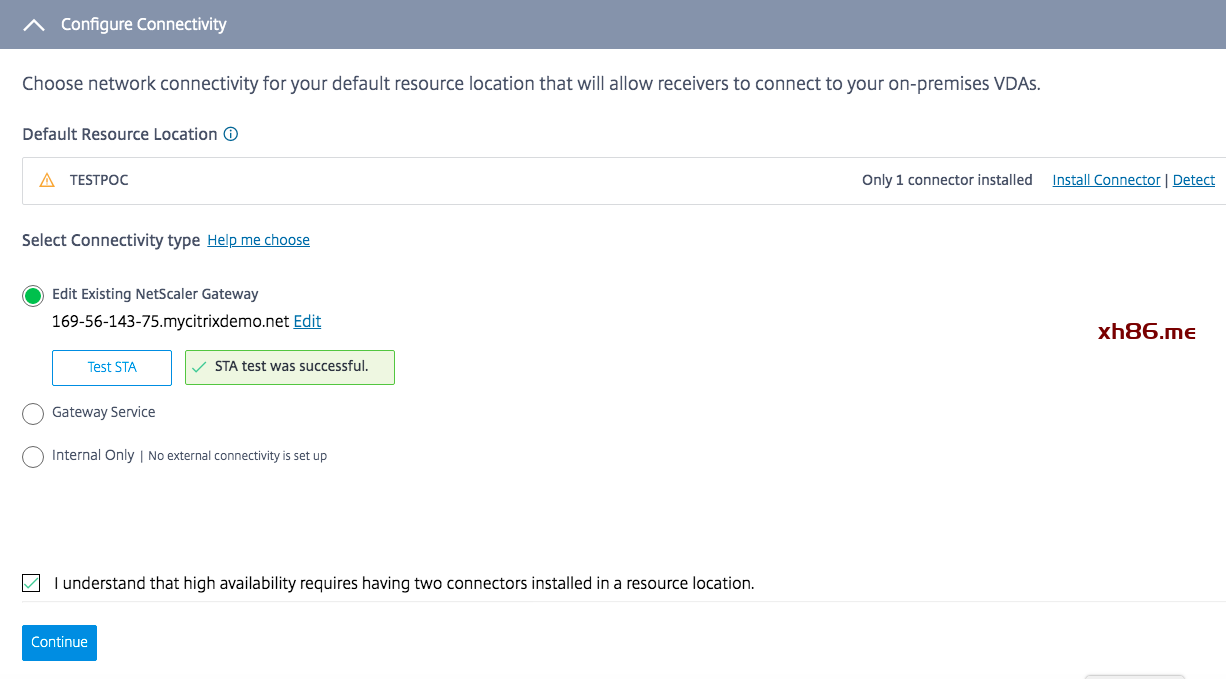
- On the Configure Connectivity screen, select Traditional Gateway. Enter the On-premise Gateway FQDN (don’t include the https part) as the Traditional Gateway Name/External FQDN, click Add
- Click the Test STA button. At the Success message, click Continue
|
| 步骤 |
操作 |
|
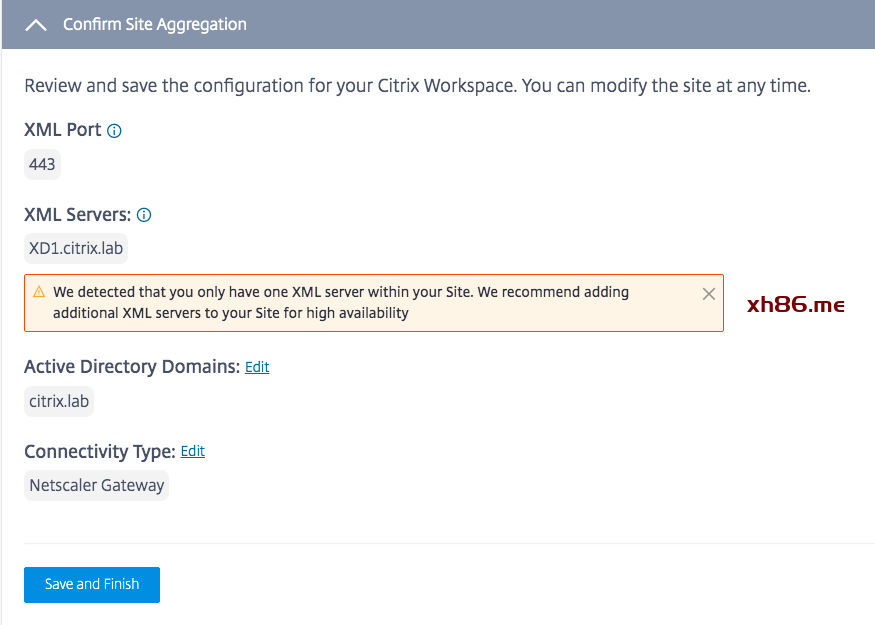
- On the Confirm Site Aggregation screen, click Save and Finish
|
|
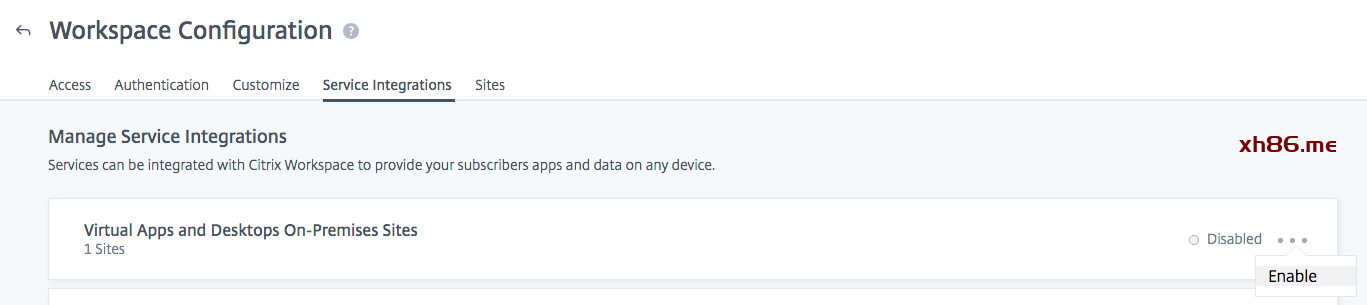
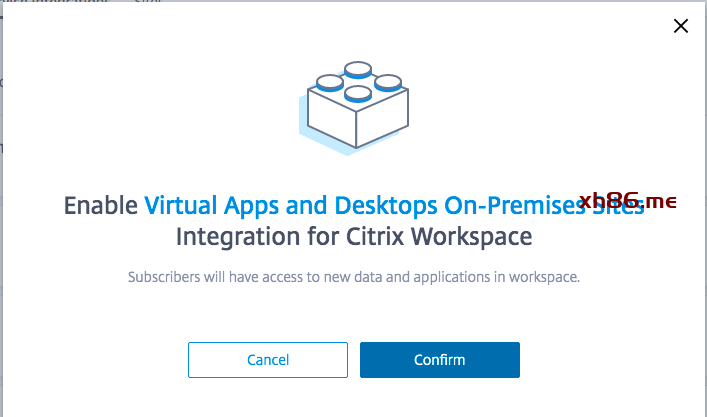
- Click on the Service Integrations tab
- Enable the Virtual Apps and Desktops On-Premises Sites by clicking on the three button menu icon at the far right and choosing Enable. Then Confirm in the following dialog box
- The VDC Resource Integration has completed
Notes:
- Log on to the Workspace with the domain user credentials
- Click on Apps to confirm the On-Prem Apps are now available in the Cloud Workspace
- Click on Desktops to confirm the On-Prem Desktops are new available in the Cloud Workspace
- If you see the On-Prem Desktops, you have successfully migrated from access the On-Prem Desktops available from StoreFront to a Citrix Cloud Environment available through Cloud Workspace
|
Integrate Resource Location – with VDA Workload only
**There may have some difference configurations between Multi-Session OS and Single-Session OS. Use “Multi-Session OS” in this document
| 步骤 |
操作 |
|
- Login to the workload machine (Server / Desktop VDA) by administrator account
- Download the VDA setup executable from www.citrix.com/download
- Launch the VDA installation
- In “Delivery Controller” page, type “Citrix Cloud Connector” address
- Complete the rest configuration and complete the installation
- Reboot the machine
|
| 步骤 |
操作 |
|
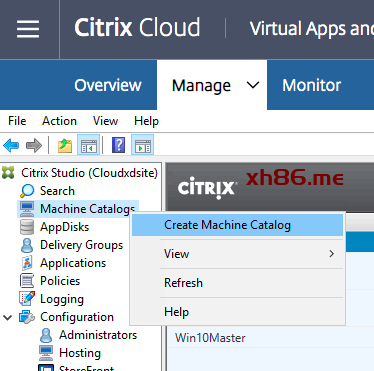
- Back to “Citrix Cloud” administration Portal
- Click the Hamburger Menu and select “Virtual Apps and Desktops”
- Click “Manage” > “Full Configuration”
- Right Click “Machine Catalogs” > “Create Machine Catalog”
|
| 步骤 |
操作 |
|
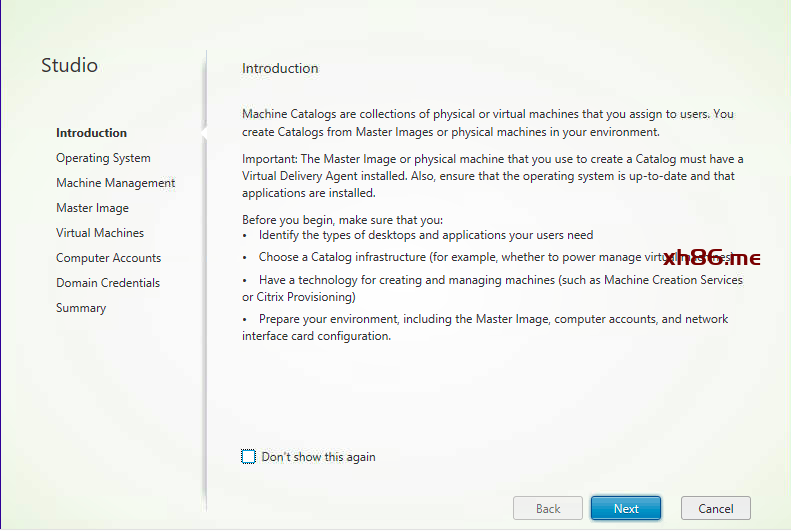
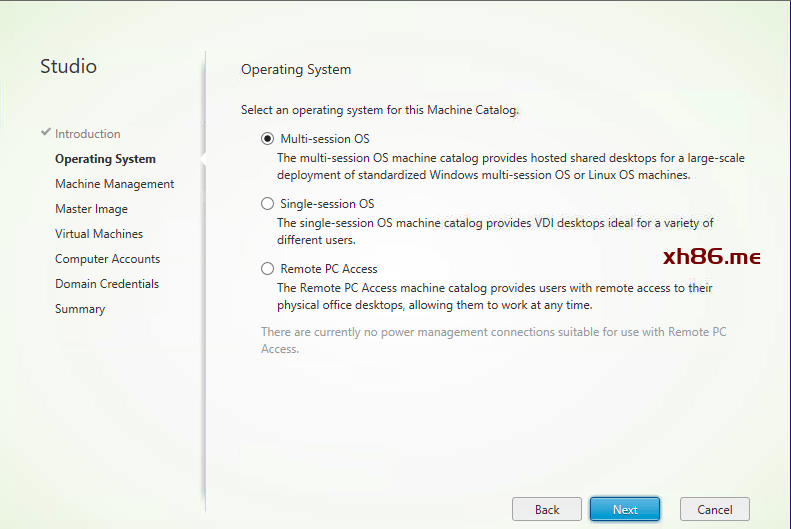
- Click “Next”
- Choose the “Operating System” type
- Multi-Session OS for Virtual Apps and Hosted Shared Desktop
- Single-Session OS for Virtual Desktop
|
| 步骤 |
操作 |
|
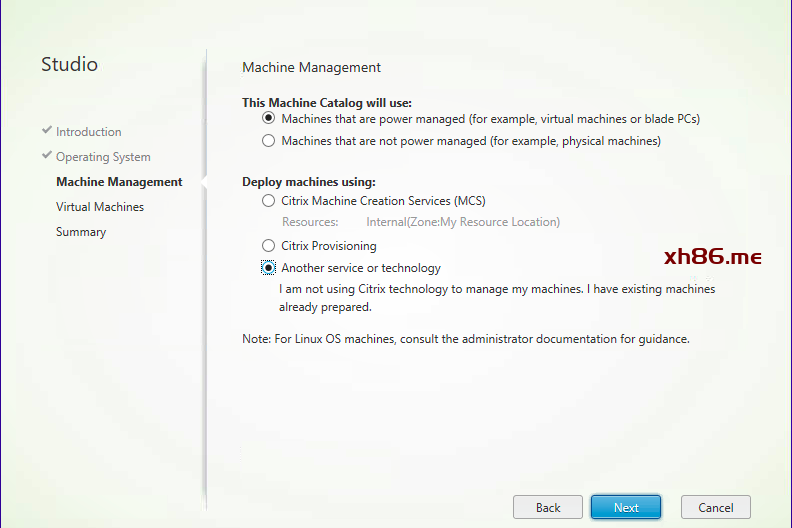
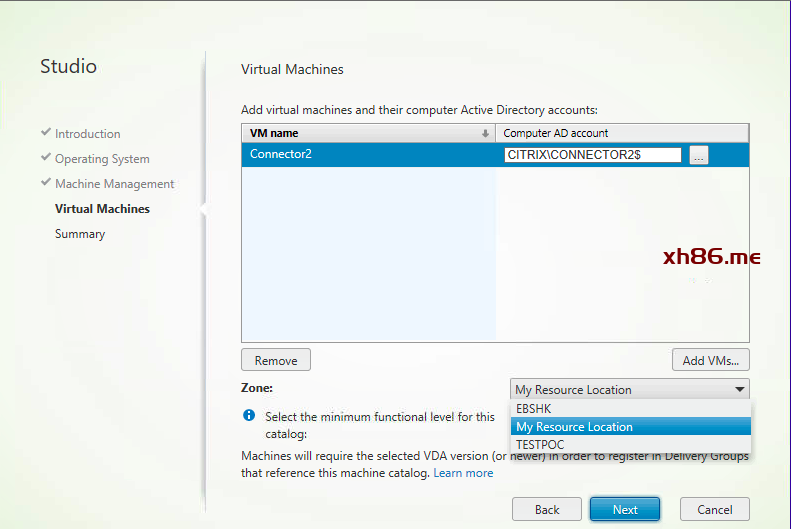
- Select “ Machines that are power managed”
- Select “Another service or technology” and click “Next”
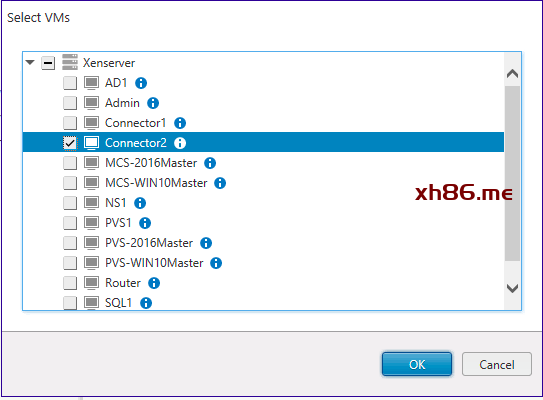
- Click “Add VMs…” to select the installed VDA machines and click “OK”
- Select the correct “Zone” and click “Next”
|
| 步骤 |
操作 |
|
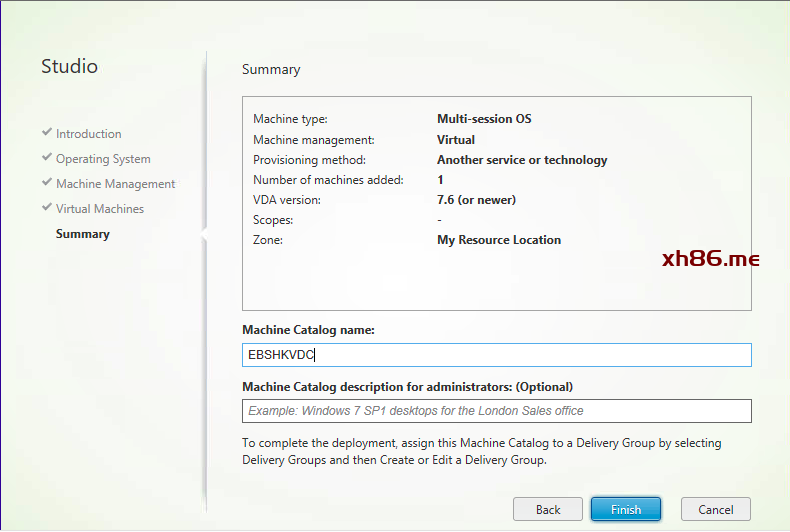
- Enter “Machine Catalog Name” and Click “Finish”
|
|
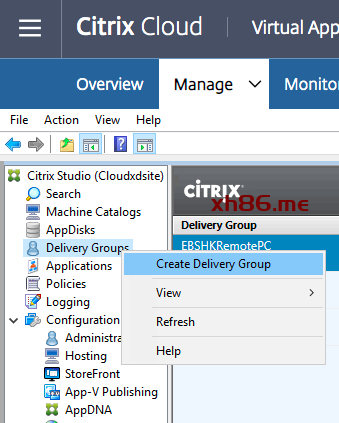
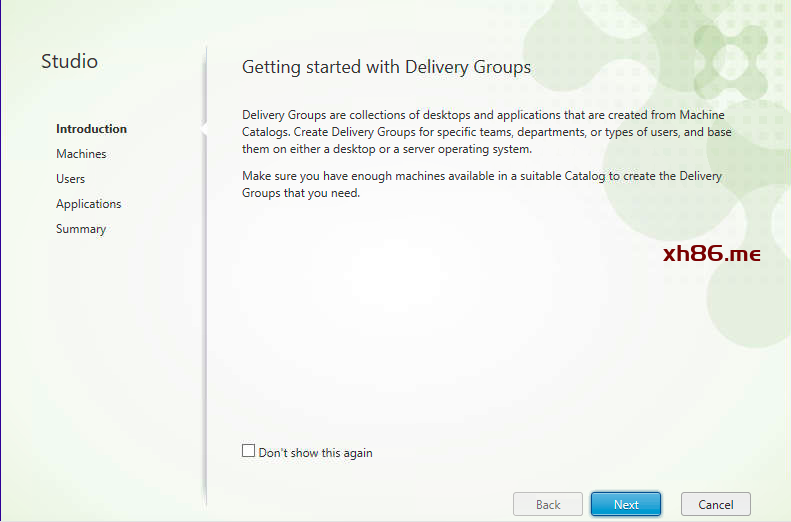
- Click “Create Delivery Group” > “Create Delivery Group”
|
| 步骤 |
操作 |
|
|
|
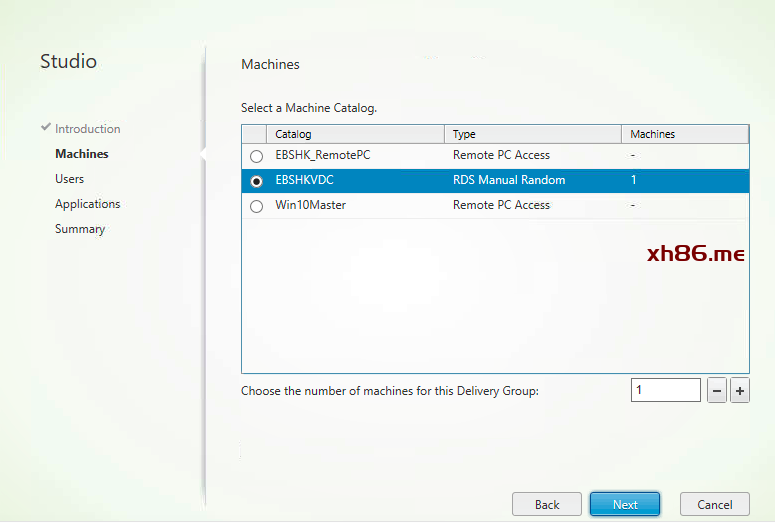
- Choose the “Machine Catalog” created before
- Click “Next”
|
| 步骤 |
操作 |
|
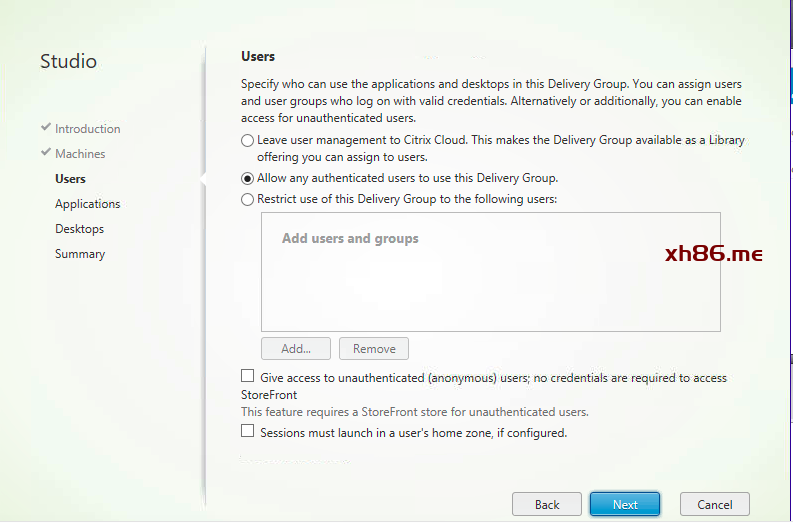
- Select “Allow any authenticated users to use this Delivery Group”
- Click “Next”
Note:
- You can select “Leave user management to Citrix Cloud. This makes the Delivery Group available as a Library offering you can assign to users” to control the resource assignment in Citrix Cloud “Library”
|
| 步骤 |
操作 |
|
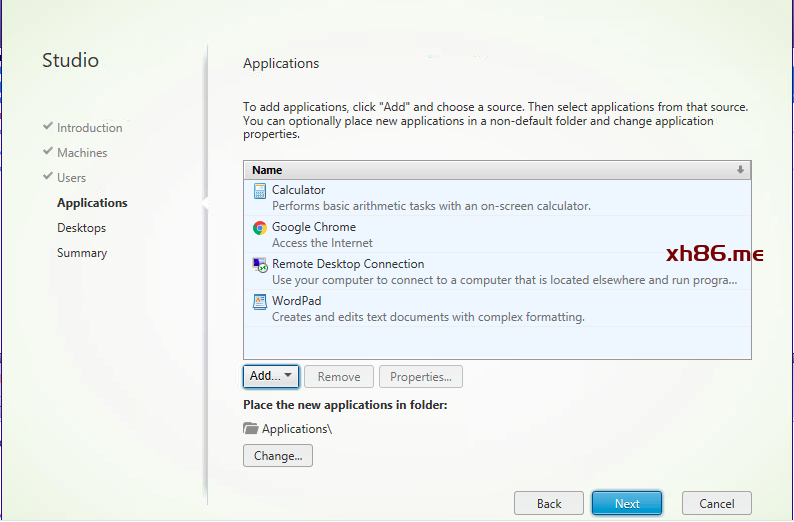
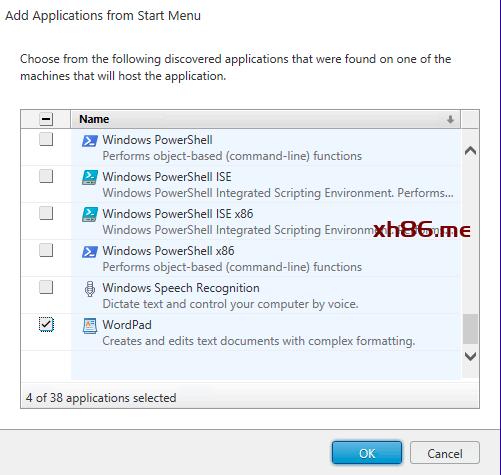
- Click “Add…” > “ From Start Menu”
- Select the application that needs to deploy and click “OK”
- Click “Next”
|
| 步骤 |
操作 |
|
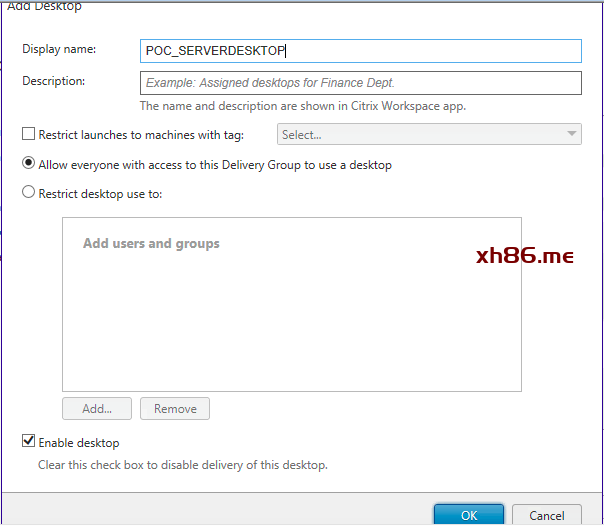
- Click “Add..”
- Enter “Display Name” for Hosted Shared Desktop deployment
- Select “Allow everyone with access to this Delivery Group to use a desktop”
- Check “Enable desktop” and click “OK”
- Click “Next”
|
| 步骤 |
操作 |
|
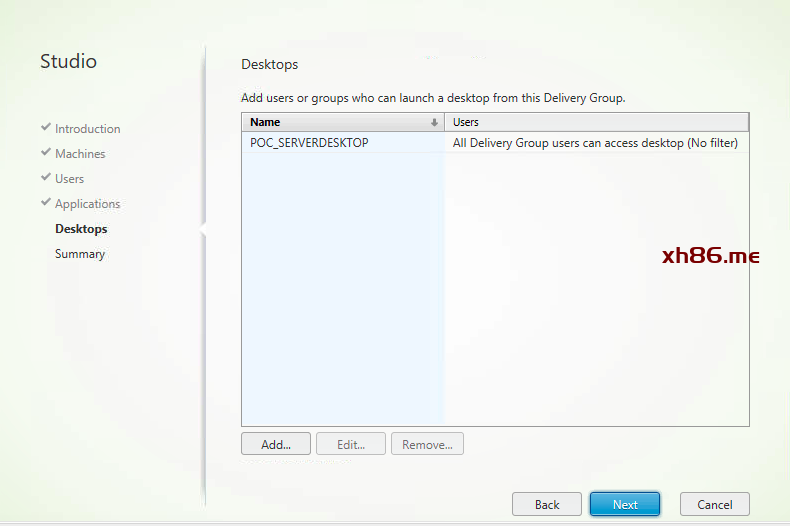
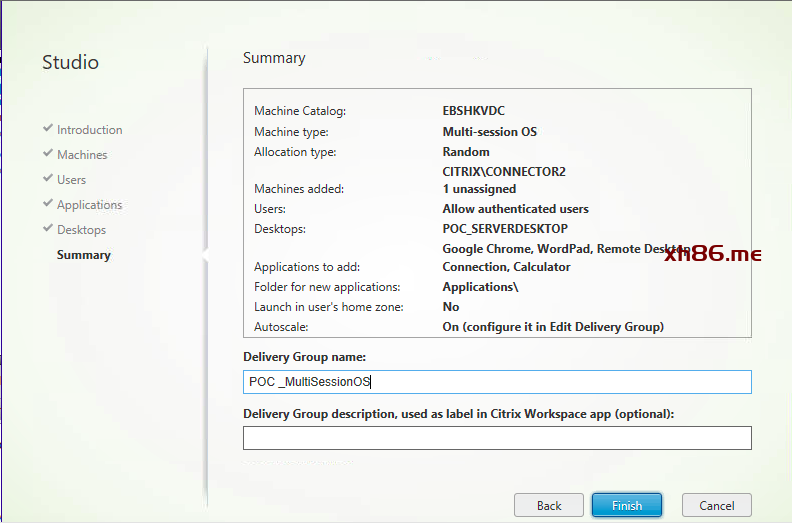
- Enter “Delivery Group name” and click “Finish”
- Check the Delivery Group is created and the VDA status as “Registered”
|
|
- Browse to Workspace URL
- Log on to the Workspace with the domain user credentials and OTP Token
- Click on Apps to confirm the delivered Apps are now available in the Cloud Workspace
- Click on Desktops to confirm the delivered Desktops are new available in the Cloud Workspace
- Click the Applications and Desktops and see they can be accessed properly
- You have successfully deploy the Apps and Desktops to a Citrix Cloud Environment available through Cloud Workspace
|